50 tips for photographing the Milky Way
In this article I share with you 50 tips for photographing the Milky Way.
Milky way photography, although not overly difficult, comes with its challenges during planning and on the shooting day.
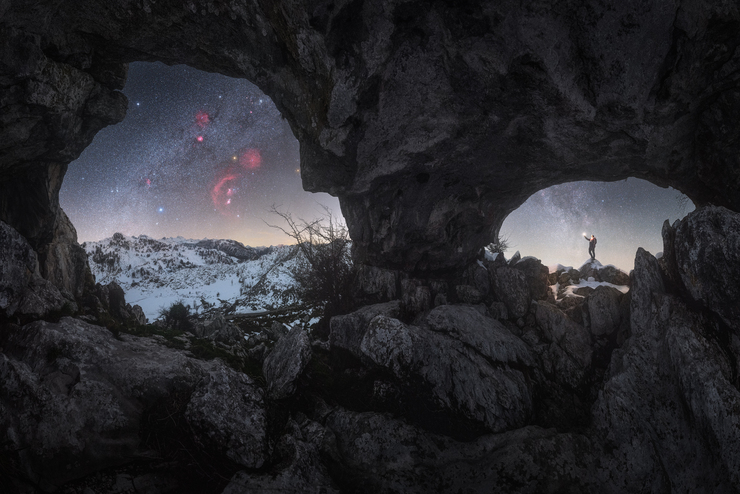
These tips aim to help you avoid surprises and achieve amazing results like those captured by Felipe Souto – the amazing photographer that captured the image I'm using as a cover for this article.
Additionally, you can access the ultimate Milky Way photography settings cheat sheet and a detailed Milky Way Photography guide for free.
Whether you're a beginner or looking to enhance your skills, these resources offer valuable insights to master the art of photographing the Milky Way.
Remember, practice and experimentation are key in improving your Milky Way photography skills, so dive in, explore the tips, and start capturing the beauty of the Milky Way in your images.
Photographing the Milky Way can be a rewarding experience with the right guidance.
So now let me tell you my favorite 50 tips for photographing the Milky Way.
"Don't be afraid to reach for the stars." - Ellen Ochoa
Get this ebook for free now!
Content
- Find inspiration looking at the best Milky Way pictures
- Get inspired by the best Milky Way photographers
- Capture all types of Milky Way
- Capture a panorama of the Milky Way arch
- Capture the Milky Way with other phenomena
- Plan your photography around the galactic core
- Plan a Milky Way shot that you can capture in winter
- Know the direction where to point your camera to
- Plan your shot on a (near) Moonless night
- Plan a Milky Way shot with the Moon
- Understand the Milky Way position in the sky
- Finding out the Milky Way position relative to the subject
- Understand the Moon position in the sky
- Finding out the Moon position relative to the subject
- Find a dark location
- Find an interesting subject
- Decide your composition
- Look for a location with space to move around
- Scout the shooting location during the day
- Respect the restrictions (if any)
- Use PhotoPills' AR views to confirm the Milky Way's position in the sky
- Check the weather forecast
- Never give up
- Use the best planning tool
- Know the height of your subject
- Take the mountains into account when planning your shot
- Use the best camera for Milky Way shots (the one you already have!)
- You can also use an astromodified camera
- Use the best lens for Milky Way photography (any short lens will do!)
- Use a sturdy tripod to get a tack sharp Milky Way
- Use an intervalometer to avoid vibrations
- Bring a headlamp
- When shooting at night, wear warm clothing
- Bring spare batteries
- Keep your lens warm to prevent condensation
- Light paint the landscape
- Make sure you're at the the exact shooting spot
- Be ready to work fast
- Switch on the lens stabilization option when it's windy
- Use the widest aperture possible
- Focus at the hyperfocal if you're using a wide angle lens
- Frame using the highest ISO available in your camera
- Adjust the shutter speed using the NPF rule
- Make sure both your subject and the Milky Way are in focus
- Use the Live View mode to focus accurately
- Use the Focus Peaking and/or the Focus Magnifier functions
- Do an exposure bracketing for difficult lighting conditions
- Use a star tracker
- Take multiple exposures for stacking or creating composites later
- Make sure that Antares or Mars look like the red giant superstars they are
- Let's go capture the Milky Way together!
1.Find inspiration looking at the best Milky Way pictures
Looking for fresh inspiration to improve your photography skills?
Exploring the works of other photographers is a fantastic way to discover new ideas, techniques, and styles. While it's crucial not to copy others directly, seeing their creations can spark your own original compositions.
Navigate through the PhotoPills Awards gallery
A straightforward and effective place to start is social media, where a treasure trove of inspiring photographs is just a click away. One inspiration resource you should regularly visit is the PhotoPills Awards, hosted on our Instagram account. This contest highlights the impressive work of photographers like you, providing a constant stream of creativity to fuel your own projects.
To dive into this vibrant community, just follow PhotoPills on Instagram.
If you're overwhelmed by the sheer volume of images online, why not explore a curated selection of the best Milky Way shots from our past contest in 2023? This carefully selected gallery showcases top-tier images and can open your eyes to the potential of astrophotography.


Additionally, don't miss out on the video by Rafael, featuring 25 stunning Milky Way photos. This visual collection is not only inspiring but also a great way to see how different techniques and compositions can result in breathtakingly beautiful shots.
Watch the video and get inspired.
Get inspired in real world too
Beyond digital platforms, consider enriching your photography knowledge through tangible means like photography books. These books often delve deep into the minds and methods of master photographers, offering detailed insights into their creative processes. Building your own library of photography books will arm you with a wealth of concepts and styles that can significantly influence your work.
Lastly, make it a point to attend photography exhibitions whenever possible. Whether it's a local art show or a major museum exhibit, each offers unique opportunities to learn and grow. Interacting with a diverse range of photographic works in person can elevate your understanding of the craft and inspire new ways to approach your photography.
So, whether it's scrolling through Instagram, studying a beautifully printed photography book, or walking through an exhibition, there are countless ways to spark that creative flame and enhance your photography skills.
2.Get inspired by the best Milky Way photographers
Finding excellent Milky Way photographers is crucial for anyone interested in this specific field of photography.
The first step is to explore the work of top-notch photographers who specialize in capturing the Milky Way. Understanding their techniques and the aesthetics they achieve can significantly improve your own photography skills.
If you're wondering where to find such photographers, don't worry! I've got you covered.
I've compiled a comprehensive list of some of the best Milky Way photographers out there. It includes a detailed rundown of photographers who master the art of shooting the Milky Way, complete with examples of their work.
What's more, I regularly update this list to include new talent and fresh perspectives as I discover them!
3.Capture the Milky Way in different positions in the sky

Photo by Carlos Ruiz
As you probably know, you can capture the Milky Way in 3 different positions in the sky:
- Vertical
- Horizontal
- Diagonal
The orientation of the Milky Way in the sky depends on your geographical location, the time of night, and the season:
- Latitude influences how the Milky Way stretches across the sky, with equatorial viewers seeing it vertically span horizon to horizon, and polar viewers more horizontally.
- The Milky Way's position changes nightly due to Earth's rotation and seasonally due to Earth's orbit around the Sun, which also reveals different sections of the galaxy.
Northern Hemisphere (1)
- In April and May, the galaxy stretches horizontally just above the horizon, creating an ideal backdrop for panoramic shots of the sweeping Milky Way arch.
- As we move into June and July, the Milky Way climbs higher and shifts from horizontal to diagonal, making these months the prime time for capturing diverse compositions of our galaxy.
- By August and September, it stands almost vertical in the sky, perfect for compositions that aim to spotlight specific elements against the majestic Milky Way.
Southern Hemisphere (2)
- From February to March, the Milky Way appears diagonal, with the Galactic Core near the horizon.
- By April and May, it begins diagonally early at night but ascends higher as the night progresses, moving the Galactic Center to mid-sky, offering unique photographic opportunities.
- From June to August, the Milky Way will be diagonal at the beginning of the night, vertical during the middle of the night, and low above the horizon at the end of the night.
- From September to October, the Milky Way will be vertical at the beginning of the night and will decrease in the sky until reaching a horizontal position.
4.Capture a panorama of the Milky Way arch
Shooting Milky Way panoramas is an amazing way to capture the galaxy stretching across the sky.
This technique isn't just about snapping a few pictures; it involves taking multiple shots that you'll later stitch together to create one stunning image.
Creating these panoramas takes more than just aiming your camera at the stars. You need to carefully plan your composition, ensuring that each part of your photo balances well from left to right, with key elements evenly distributed throughout the scene.
It's a skill that requires practice, patience, and a good grasp of photography techniques. So, if you're up for a challenge and want to try capturing the full arc of the Milky Way above a beautiful landscape, this is definitely a rewarding project to undertake.
If you want to shoot a Milky Way panorama, just follow these 6 steps:
1. Plan your Milky Way panorama with PhotoPills.
2. Choose the best gear for Milky Way panoramas.
- A good camera for Milky Way photography.
- A good lens to capture the Milky Way.
- A leveling base.
- A panoramic ball head.
- An l-bracket.
- A nodal rail.
- A star tracker.
3. Shoot the full arch of the Milky Way.
- Level your tripod.
- Frame your Milky Way panorama.
- Decide how many rows your Milky Way panorama will have.
- Determine your camera settings.
- Shoot your Milky Way panorama.
4. Review your Milky Way panorama images.
5. Stitch your Milky Way panorama using a post-processing software (Lightroom, Photoshop, PTGui).
6. Edit your Milky Way panorama in Lightroom or Photoshop.
If you want to learn all you need to create amazing panoramas of the Milky Way from start to finish, watch our Masterclass with Adam Woodworth.
5.Capture the Milky Way with other phenomena
Apart from the Milky Way itself and the surrounding landscape, you can aim to capture the scene adding another phenomena like Meteor Showers or the northern lights.
The results, as you can see from the pictures below, are spectacular!
Milky Way and Meteor Showers

Photo by Matej Mlakar
Photographing the Milky Way alongside a meteor shower can create a stunning and powerful image for several compelling reasons:
Enhanced visual Interest. The Milky Way itself is a spectacular subject due to its dense collection of stars, dust, and gas clouds, forming a luminous band across the sky. Adding the dynamic element of meteors streaking through the sky introduces additional points of interest, making the composition more dynamic and visually captivating.
Increased drama and scale. Meteors provide a sense of scale and movement against the backdrop of the Milky Way, emphasizing the vastness and the dynamic nature of the cosmos.
Unique compositions. Meteors are unpredictable, and each meteor has a unique trajectory. This unpredictability allows for unique compositions where no two photographs are the same. Capturing a meteor along with the Milky Way can result in a one-of-a-kind image.
Storytelling. The combination of the Milky Way and meteors can tell a compelling story.
Technical practice. Successfully capturing both the Milky Way and meteors requires skill in long exposure and night photography techniques. Therefore, it's a great exercise to improve your ability to manage lighting, exposure, and timing.
Milky Way and northern lights

Photo by Giulio Cobianchi
Photographing the Milky Way alongside the northern lights can create an extraordinarily powerful and visually stunning image for several reasons:
Color contrast. The Milky Way is predominantly characterized by white and pale blue hues, interspersed with the dark lanes of cosmic dust. The northern lights, on the other hand, can display a range of colors from vibrant greens to deep purples and reds, depending on the altitude and type of gas particles involved. This color contrast can make the image more vibrant and captivating.
Sense of movement. While the Milky Way gives a sense of spatial depth and constancy, the northern lights add a dynamic element of movement. Their shifting, flowing patterns provide a sense of the ephemeral and unpredictable, which can make photographs appear more lively and engaging.
Narrative depth. The juxtaposition of these two phenomena can symbolize the connection between our planet and the wider universe.
Photographic challenge. Successfully capturing both the Milky Way and the northern lights is a challenging photographic achievement that requires skill in balancing exposure, timing, and composition. It's great to practice and become a dark sky photography master.
Rare opportunity. Since both phenomena require specific conditions to observe – clear, dark skies for the Milky Way and geomagnetic activity for the northern lights – capturing them together can be rare and thus more valuable and unique.
6.Plan your photography around the galactic core
If you're keen on capturing stunning photos of the Milky Way's Galactic Core, timing and location are key.
This dazzling part of our galaxy lights up the sky during specific months, depending on where you are on the globe.
Northern Hemisphere (1)
In the Northern Hemisphere, the best time to view the galactic core is from late April through late July. Look towards the southeastern to southwestern sky. As the summer months progress, the core shifts westward, rising in the southwestern sky by the end of summer.
However, during the winter, the Galactic Center is not visible.
Though less luminous, the winter Milky Way can still be a breathtaking sight in the Northern Hemisphere from December to February, resembling glitter against the cold, clear night sky. Don't miss out on this quieter beauty! (tip #8)
Southern Hemisphere (2)
Southern Hemisphere photographers have a longer viewing window, from February to October, with the core at its brightest in June and July.
For the best views, aim your camera south between May and September. In May, the core appears around midnight in the southeastern sky, moves directly overhead by August, and starts to set after sunset in September.
If you want to see a practical example, have a look at this video where Rafael works on a plan of the Milky Way rising next to Tangle Ridge in the Canadian Rockies:
7.Know the direction where to point your camera to
Where you're located in the world will determine where the Milky Way will be in the sky.
In the northern hemisphere, the Galactic Center is visible in the southern half of the sky. So keep that in mind when planning your shot as you'll need to point your camera to the south.
In the southern hemisphere, it can be positioned directly overhead, particularly in the peak of the Milky Way season around the time of the June Solstice. So you'll need to point your camera up.
Here's the short version...
- Northern Hemisphere: The best of the Milky Way season goes from April through October. Look south.
- Southern Hemisphere: The best of the Milky Way season goes from February to October. Look high up.
8.Plan a Milky Way shot that you can capture in winter

Photo by Pablo Ruiz
Photographing the Milky Way when the Galactic Center is visible is super fun.
But you know that in the Northern Hemisphere the Core of the Milky Way is only visible (more or less) from March to October.
And from February to November in the Southern Hemisphere.
So what can you do in winter in the Northern Hemisphere, and in summer in the Southern Hemisphere?
Is it worth photographing the Milky Way at that time of the year?
Of course it's worth it!
The thin part of the Milky Way looks amazing too, and it's super fun to photograph it.
To do it, all you need is a plan.
If you're looking for some inspiration, I suggest you watch the video below where Rafa explains how to plan your Winter Milky Way photo ideas step by step.
9.Plan your shot on a (near) Moonless night
If you're keen on night sky photography, choosing the right lunar phase can make all the difference in your shots. Every 27.3 days, our Moon completes an orbit around the Sun, presenting consistent lunar views.
If you're keen on capturing the Milky Way in all its glory, the New Moon phase is your best bet.
During the New Moon, the Moon positions itself between the Earth and the Sun. This alignment means that no sunlight illuminates the Moon's side facing us, resulting in pitch-dark nights perfect for stargazing and photography.
Specifically, the darkest skies for Milky Way photography occur on the night of the New Moon.
But you're not limited to just that night – there are about 5 to 6 nights before and after the New Moon that are also ideal. During these times, the Moon isn't visible for about 1 to 2 hours each night, stretching up to 10 hours. This gives you a span of 10 to 12 days around the New Moon to plan your photo sessions.
It's also crucial to avoid light pollution and choose locations far from urban areas. For the best results, aim for moonless nights around midnight when the sky is darkest. Always check the moonrise and moonset times for your specific location and dates.
Don't worry if you miss the New Moon period; you can still capture the Milky Way at other times during the month...
- Quarter and Crescent Moon: These phases offer a balance, lighting up the foreground while still allowing the stars to shine. Position yourself with the Moon behind you to capture a well-lit landscape against a backdrop of stars. A Quarter Moon is much dimmer than a Full Moon, giving off only about 9% of the Full Moon's brightness.
- Full Moon: A Full Moon can light up the foreground of your scenes beautifully, reducing the effects of light pollution. It's perfect for illuminating landscapes but not the best for spotting faint stars as the Moon's brightness can overshadow them.
10.Plan a Milky Way shot with the Moon

Photo by César Álvarez
I know that everybody's suggestion you to photograph the Milky Way when the Moon is under the horizon!
Actually, I have to admit that I did it too in tip #9.
But in my opinion having the Moon above the horizon is not necessarily a bad thing.
Actually it can be a really good thing!
This is particularly true when you're photographing a vast landscape along with the Milky Way and you want to capture detail in the foreground in the landscape too.
If that's the case, the light reflected by the Moon will come in handy!
But to achieve this you need a good planning and PhotoPills of course... ;)
So have a look at the video below, where Rafa shows you how you can easily plan your Milky Way shots to have the Moon with the right phase and the right position in the sky to help you correctly expose both the Milky Way and your foreground in a single shot.
11.Understand the Milky Way position in the sky
Planning is key to making sure the Milky Way is exactly where you need it in your shot. Fortunately, PhotoPills that can make this a whole lot easier.
First things first, you need to pinpoint three crucial pieces of information:
Your shooting spot.
The date you plan to take the photo.
The precise time you'll be shooting.
Now, to locate the Milky Way accurately, you need to understand two terms:
- Azimuth. The azimuth is all about direction. It's a circle of 360º around you, with 0º pointing to True North, helping you figure out which way to face to see the Milky Way.
- Elevation. The elevation tells you how high up in the sky the Milky Way will be, with values ranging from 0º (right at the horizon) to 90º (directly overhead).
PhotoPills makes it super easy to get this info.
If you want to know everything about the azimuth and elevation, you should definitely watch this video:
- At home, you can use the app's map to see:
- When you're on location, ready to shoot, simply tap the Night AR button in the PhotoPills app. This activates an Augmented Reality view, allowing you to visually place the Milky Way in the sky through your phone's screen.
If you want to dive deeper into understanding azimuth and elevation, read everything you need to know about the azimuth and the elevation.
12.Finding out the Milky Way position relative to the subject


As you've read in tip #3, you can have different compositions at different times of the night.
You can get the complete Milky Way arching over the landscape, which is great to capture a panorama. Or you can get part of the Milky Way in vertical, diagonal and horizontal orientation.
Sure, you'll come up with multiple ideas of different compositions. Usually, you know the exact position you want the Galactic Center to be in your image, but you don't know whether the scene is possible or when it occurs.
There is no secret: the key to photographing stars is planning.
Thanks to PhotoPills you can do all the planning for you in a breeze.
Here are 2 complete tutorials to help you easily plan any photo of the Milky Way you imagine:
Use the PhotoPills Planner (1)
First, have a look at the following video:
Then, read our How to plan the Milky Way using the Planner guide.
Use the PhotoPills Night AR view (2)
First, have a look at the following video:
Then, read our How to plan the Milky Way using the Night Augmented Reality view guide.
13.Understand the Moon position in the sky

Photo by Daniel Sanz
When you imagine a picture of the Moon, you probably envision a photo of a certain subject and the Moon in a specific position in the frame (in the sky).
But how can you know if the Moon will be where you want to be?
And if it does, how can you determine when it will happen?
The answer to your prayers is PhotoPills (as usual!).
Having said that, first you need to know 3 things:
The shooting spot. The position where you're going to be taking the photo from.
The shooting date. The day you intend to take the picture.
The exact shooting time (in hours and minutes).
Once you know these 3 inputs, PhotoPills will help you know the Moon position.
OK, how do you define the Moon position in the sky? With 2 variables:
- The azimuth. It determines the Moon's direction and it's expressed with a number that goes from 0º to 359º where 0º is the True North.
- The elevation. It determines the Moon's altitude in the sky and it's expressed with a number that goes from 0º to 90º where 0º is the horizon.
If you want to know everything about the azimuth and elevation, you should definitely watch this video:
How can you see the Moon's azimuth and elevation in PhotoPills? Easy!
- From home, on the map,
- At the shooting location, when you're at the Red Pin position, tap the AR button (bottom of the screen) to visualize the Moon position with the Augmented Reality view ;)
If you want to expand on the subject, you can read everything you need to know about the azimuth and the elevation.
14.Finding out the Moon position relative to the subject

Photo by Karol Ryan
When you want to shoot a very specific composition, you need to define the Moon position relative to the terrain and/or height of your subject.
(Obviously, you need to know your subject's height in advance).
But how can you do this?
Scout the location and use PhotoPills' AR (1)
The first piece of advice that comes to mind is that you should always scout the location thoroughly during daytime. It's the best way to figure out if something will block the view of the subject and/or the Moon from the shooting spot.
Apart from checking it with your own eyes, once you're at the Red Pin position (according to your PhotoPills plan), tap the AR button (bottom of the screen) on the Planner to visualize the Moon position with the Augmented Reality view ;)
Ideally, you should do this 2-3 days before the shooting date... If you can't, go at least a few hours before the shooting time.
You can find more details reading tip #19.
Use the PhotoPills Planner (2)
You can also find the information you need using the Planner:
- Change the map type to Terrain, so you can visualize the topography (mountains, hills, valleys, etc.).
- Take advantage of Panel 2 as tells you everything you need:
- The Moon altitude above the Black Pin. Actually, it's the center of the Moon altitude above ground level where you've placed the Black Pin.
- The Moon size, so you know how big it's going to be compared to the subject.
- As you change the Black Pin's position, you'll notice the Moon's altitude and size vary as well. So you can move the Black Pin along the Moon's azimuth (thin blue line) to know how the terrain changes along the shooting direction.
I suggest you have a look at these videos where Rafael explains everything with real plans:
- 'How to plan a photo of the next Full Moon with a building'.
- 'Will the Moon be blocked by a mountain?'.
15.Find a dark location
If you're into stargazing or night photography, finding a spot away from city lights is crucial. Here's how you can locate nearby dark sky areas:
- NASA's Blue Marble: This website pairs with Google Maps to show you detailed night lights imagery. You can see enhanced maps with town names and borders to easily spot darker spots.
- The World At Night (TWAN): Browse through a massive collection of categorized astronomic images from around the world, all sorted by region to help you find the perfect stargazing location.
- International Dark Sky locations: It works to protect night skies for future generations. Their database includes different types of dark sky places like parks and sanctuaries, perfect for a clear view of the stars.
- Wikipedia Observatories list: Observatories are typically in areas with very dark skies, making them ideal for stargazing.
- Light Pollution Map app: Available on iOS and Android, this app shows you light pollution maps and highlights great spots for watching Meteor Showers or just enjoying the stars.
These resources make it easier to enjoy pristine night skies, wherever you are.
16.Find an interesting subject

Photo by John Kimwell
Photography, like all art forms, often faces the challenge of originality since many ideas have already been explored.
Capturing a unique Milky Way photo isn't just about finding a rare spot; it's also about choosing an engaging subject for your shot.
Fortunately, you don't need to venture into remote or hard-to-reach places to find such subjects and locations. The main focus in your photo should be a compelling element that draws the viewer's eye, something that makes your image stand out.
When searching for the perfect setting, either online or in person, look for distinctive features in the landscape such as unique rock formations, trees, buildings like lighthouses or ruins, bridges, monuments, or even a human figure.
If you're unsure where to start, a helpful resource is section 5 of our Milky Way photography guide, which can offer you some insight into effective scouting for photography locations.
17.Decide your composition
When planning a photo of the Milky Way, think about what you really want to capture. Ask yourself:
- What should be in the frame? You might want to include other objects besides the Milky Way, or maybe you prefer a lot of open space around it.
- Where should the key elements be? You can place the Milky Way above an object or behind it, depending on what looks best.
Remember, the composition of your photo is key.
A simpler layout often makes it easier for people to grasp the emotion and story your photo is telling. I love straightforward compositions because they let the main subjects shine without distraction.
However, this doesn't mean you should avoid adding elements. The number of items in your shot really depends on your location and how you want to tell your story. Play around with different setups to see what works best for your vision.
To make your Milky Way images pop, think carefully about the foreground.
Just adding something simple, like a person, can transform your shot from ordinary to extraordinary. You want to give your viewers some context, something that adds depth and interest to the vastness of space.
Consider using unique natural features like sea stacks, arches, or even an old, rundown shed. These elements can create a fascinating focal point.
Also, playing around with reflections can bring a magical touch to your Milky Way photography. Water gives you so many options when you come to shoot. It might be a beautiful mountain landscape reflecting in the glassy waters, for instance.
Shooting motionless water gives us a pure, mirror-like reflection. It can be quite hard to judge when you will get this type of motionless water but it is most often found during the night.
Small sheltered lakes are more likely to give you that perfect stillness. Seas, oceans and large lakes often have some amount of breeze causing ripples.
18.Look for a location with space to move around

Photo by Stefano Astorri
When planning your Milky Way photography, choosing a spacious shooting location is crucial, and here's why.
Photographing the Milky Way requires precision, especially if you're aiming for specific alignments with your subject. Sometimes, a few meters can make a difference between capturing the perfect alignment and missing it entirely.
Having plenty of room at your location is beneficial for two reasons:
If your initial shooting spot isn't quite right, you can easily move around to adjust your position and recompose your shot.
More space also means more potential spots to set up, which increases your options for different compositions.
However, it's not just about having space to move. Being able to quickly adjust and work efficiently is equally important because the Milky Way won't wait for you.
19.Scout the shooting location during the day
To get the best shots at any location, it's crucial to scout it ahead of time – even if it's a place you think you know well. Things change, and you'll want to be prepared for any scenario that might arise.
Here's a straightforward guide to make your location scouting effective:
Plan your route. Know exactly how to get to your location. Check the duration it takes to travel there and consider any traffic patterns. It's always better to be early to feel relaxed rather than rushed.
Check all accesses. Determine if the location is easily accessible. Are there any restrictions like opening times or areas that are off-limits? Knowing these in advance saves time and trouble.
Visit it multiple times. If possible, visit the location at different times of the day. This helps you understand the lighting conditions and light pollution, which is crucial for planning your shoot.
Use technology. Utilize tools like PhotoPills to mark points of interest. This powerful app allows you to save specific spots you'd like to capture, ensuring you won't forget them on the day of the shoot.
Take preliminary shots. While scouting, use your phone to take photos of potential shots. This helps in pre-visualizing the scene and planning your compositions.
Explore different perspectives. See if the location offers multiple shooting angles. A good spot doesn't limit you to one view but provides several interesting options to create varied images.
Note safety and hazards. Always prioritize safety. Be aware of any potential dangers, especially in low-light conditions. Ensure every part of the location is safe for shooting. If it's not, it's better to skip it than to risk an accident.
Remember, the key to great photography often lies in the preparation as much as in the execution.
20.Respect the restrictions (if any)

Photo by Vladimir Somers
Photography can be incredibly fun, but it sometimes leads to the temptation of trespassing on private property. It's important to remember that even if no one seems to mind, trespassing is still illegal, and some people might even resort to breaking and entering.
However, crossing this line into illegal activity should be avoided at all costs. Remember, you're a photographer, not a vandal.
No photograph is worth the potential legal consequences of trespassing.
You might encounter security guards while exploring restricted areas. They might only ask you to leave, and it's best to comply politely and avoid any trouble. Arguing or refusing to leave can escalate the situation, prompting them to call the police, which could lead to you facing charges, fines, or even a court appearance.
If you do choose to go ahead and enter a property, it's crucial to respect the space. Don't break anything and strive to leave no trace of your visit. Take your photos quietly and leave as you found it.
Laws regarding trespassing vary by country, so it's essential to familiarize yourself with local regulations before you venture out. Being informed and respectful can save you a lot of trouble down the line.
21.Use PhotoPills' AR views to confirm the Milky Way's position in the sky
PhotoPills has an awesome feature called the Augmented Reality (AR) Night view, which is perfect when planning to capture the Milky Way.
By simply selecting a date, time, and shooting spot (marked by the Red Pin), you can use this tool to see exactly where the Milky Way will appear in the sky at that moment.
It's super user-friendly; just go to your chosen location, stand at the Red Pin, and hit the Night AR button. The app then shows you the position of the Milky Way on your phone's screen.
There's even a video where Rafa uses the AR view in a stunning setting to check the Milky Way's location:
This feature isn't just for observing; it helps you visualize and plan your photos. You can see your planned shot and adjust your framing to get the best composition before you take the picture.
This tool really takes the guesswork out of astrophotography, making it easier and more accessible for everyone interested in capturing the night sky.
22.Check the weather forecast
Predicting the weather is crucial for Milky Way photography.
Knowing the forecast helps you prepare for what to expect at your location and ensures you find the conditions you're aiming for. It's not just about catching the best shots; it's also about safety. Weather conditions can change quickly, especially in certain locations, so being prepared is key.
These days, technology offers us the advantage of advanced weather forecasts. You can access detailed forecasts up to several days ahead from various sources.
Personally, I rely on a 7-day weather forecast to get a general idea of the expected conditions. I start checking the weather a week in advance and continue to update myself daily, right up to a few hours before I head out.
This method allows me to have the latest information and adapt my plans accordingly. I recommend using multiple sources to ensure the data you get is reliable.
Here are my top picks for weather apps and websites that provide accurate and comprehensive weather forecasts:
Windy (iOS and Android): This is one of my favorites because of its dependable information. It's intuitive and detailed, perfect for planning outdoor photography.
Ventusky (iOS and Android): This app is great for visual learners as it uses multiple maps to display weather conditions, helping you visualize what the weather will look like.
Meteoblue (Website): Their unique feature, the meteogram, provides three charts showing temperature, rain, and cloud coverage, which are particularly useful for photographers looking to capture the Milky Way.
23.Never give up

Photo by Alberto Moreno
If you're a beginner photographer feeling discouraged about capturing the perfect Milky Way shot, you're not alone. Even with meticulous planning using tools like PhotoPills, things can still go awry.
Common issues include unexpectedly bad weather, such as strong winds and cloud cover, or unexpected obstacles blocking your planned view of the Milky Way.
However, don't let these setbacks stop you.
Persistence is key.
If you have a specific image you're determined to capture, pursue it passionately. Don't be deterred by bad weather; sometimes conditions can change quickly at your location, turning what seemed like a lost cause into a successful shoot.
If clouds are blocking your shot, use the opportunity to scout for alternative views or alignments that are unobstructed.
Always remember, finding a solution to these challenges not only tests your creativity but also enhances your skills. And when you finally capture that elusive shot, the satisfaction of overcoming the obstacles will make your success even sweeter.
So, keep your spirits high and keep trying – the perfect shot is out there, and with determination and a bit of adaptability, you'll capture it.
24.Use the best planning tool
If you're into photography, you've got to check out PhotoPills.
It's essentially a Swiss Army Knife for photographers, packed into a handy mobile app. My friend Francesco Gola likes to call it that, and honestly, I agree.
Think of PhotoPills as your ultimate photography toolbox, filled with various tools – or "pills" – designed to help at different stages of your photography process.
Some of these pills are perfect for planning your shots well ahead of time. Others are super useful when you're out in the field, helping you execute that perfect shot. There's even a pill that helps you pick the best lens based on what kind of image you're aiming to capture.
Let's dive into some of the coolest features PhotoPills offers:
- Widgets. There are a few handy widgets that give you a snapshot of photography conditions. One shows you the essential info for your location over the next 24 hours. Another pinpoints when the Galactic Center of the Milky Way will be visible. The third keeps track of your upcoming photography plans.
- Augmented Reality (AR) views. This is a game changer. With AR, you can see where the Milky Way and Moon will be at any time, directly overlaid onto the real world through your phone's camera. This tool aligns with the Red Pin, helping you pinpoint the perfect position and time for your shots.
- The Planner. This is arguably the most powerful tool in PhotoPills. It allows you to input when and where you want to shoot, or if you know your location, it can suggest the best dates and times. This flexibility makes it incredibly valuable for meticulous planning.
The best way to get the hang of PhotoPills? Just start using it.
Begin with something simple, like figuring out when and where the Milky Way will rise, and gradually add more layers to your plan, like aligning the Milky Way with a specific landmark.
If you're looking to dive deeper, have a look at our Academy where you'll find loads of resources and tutorials. And check our YouTube channel, which is filled with tips and tricks.
25.Know the height of your subject

Photo by Liana Manukyan
Capturing the perfect shot of the Milky Way as it aligns with a specific landscape feature, like the peak of a mountain, isn't just about luck; it involves precise planning and understanding of where the Milky Way will be in the sky relative to your subject.
This crucial positioning depends on two key factors:
- The azimuth, which is the direction in degrees (with North as 0°).
- The elevation, or how high the Milky Way is above the horizon.
To get that stunning shot where the Milky Way perfectly frames your chosen subject, you'll need to adjust for the height of the subject within PhotoPills. This ensures that the Galactic Center of the Milky Way aligns exactly where you want it in your frame, enhancing the composition dramatically.
26.Take the mountains into account when planning your shot
Let's say you want to plan the perfect photo of the Milky Way aligned with the Matterhorn (4,478 m) in the Alps. Your planning requires precision, especially when you're unfamiliar with the terrain and can't afford a scouting trip.
Use PhotoPills and follow these steps:
Plan with your shot with PhotoPills (1)
If you're new to this app, refer to our Milky Way planning tutorial using PhotoPills, which will walk you through the basics of setting up your shot.
Check the Milky Way's position (2)
On the Planner, find Panel 2 where you can check the altitude of the Milky Way's Galactic Core. Ideally, you want this number to be over 5,000 meters. This altitude ensures the Galactic Center is visible and not obscured by any landscape features.
Adjust the Black Pin (3)
Use the Black Pin to navigate along the Milky Way's azimuth line (white line). While doing this, continuously monitor the altitude displayed in Panel 2. Your goal is to maintain the Galactic Center's height above 5,000 meters. If at any point the height drops below 5,000 meters, it indicates potential obstructions in your line of sight.
Find an unobstructed view (4)
Should you encounter an obstacle, don't worry.
Simply move the Red Pin to explore alternative shooting locations along the Milky Way's azimuth. Repeat the process until you identify a spot where the view of the Galactic Core is clear, ensuring nothing will ruin your shot.
Bonus tip: Scout with the Night Augmented Reality view (5)
Although visiting the location ahead of time is the best way to ensure everything goes smoothly, PhotoPills offers a practical solution if you can't make an early trip.
Utilize the Night Augmented Reality (AR) view to simulate the shooting conditions with your camera and lens. This feature can be a game-changer, providing a virtual preview of the photographic site.
27.Use the best camera for Milky Way shots (the one you already have!)

Photo by MaryBeth Kiczenski
When it comes to capturing the Milky Way, many photographers wonder about the best camera to use.
During my PhotoPills workshops, I often address this query, and my advice always echoes the wisdom of renowned photographer Jay Maysel:
"The best camera is the one you have with you."
Truly, there isn't a definitive "best" or "worst" camera for photographing the Milky Way. While higher-end cameras might produce less noise in low-light conditions, any perceived shortcomings can be mitigated through post-production techniques to reduce noise. So, don't hold back waiting to buy the perfect, expensive camera; start shooting with whatever camera you currently own.
Practice and experience are far more crucial in Milky Way photography than the equipment you use.
However, if you're still curious about which cameras might enhance your astrophotography, feel free to check out our detailed review of the best cameras for Milky Way photography.
28.You can also use an astromodified camera
You may have heard astrophotographers talk about using an astromodified camera.
But what is exactly this type of camera?
And most importantly, do you need one?
What is an astromodified camera?
Astro modified cameras are a special tweak on the usual DSLR or mirrorless cameras. These cameras have had part of their infrared (IR) filter removed.
Why do this?
It allows the camera to pick up better colors from distant cosmic features, especially nebulae.
This is because it enhances the camera's ability to capture the Hydrogen Alpha spectral line at 656nm. This particular wavelength is emitted by the glowing Hydrogen gas found in emission nebulae, giving you richer, more detailed photos of these distant gas clouds.
Do you need an astromodified camera?
Modifying a camera for astrophotography isn't necessary for everyone. Many astrophotographers achieve brilliant results using standard, non-modified cameras. These regular cameras are already quite capable of capturing impressive space images.
So, when should you consider an astro modified camera?
It's a good option if you're an experienced astrophotographer looking to push past the limits of your current equipment. An astro modified camera can open up new possibilities in your photography, allowing you to capture more detailed and vibrant images from the night sky.
But if you're just starting out in astrophotography, stick with a regular DSLR or mirrorless camera. They perform exceptionally well and will serve you just fine as you learn the ropes.
Later on, as you grow in your hobby, you might think about either modifying your camera or investing in a pre-modified one to expand your capabilities.
If you want to learn all you need to know about astromodified cameras, watch our Masterclass with Dan Zafra.
29.Use the best lens for Milky Way photography (any short lens will do!)

Photo by Carlos González
I generally recommend using a shorter lens to fit the vast Milky Way, a striking subject, and some landscape into your frame.
The shortest lens you have should do the trick, but if you're willing to invest a bit more, there are a couple of additional tips to consider for truly standout photos.
Consider a fast lens (1)
A wide aperture is key as it allows more light to reach your camera's sensor. This increase in light reduces noise, which you'll recognize as the graininess typically visible in darker shots. Less noise translates to clearer, more vibrant images.
Don't skimp on the quality of your lenses (2)
The clarity of your photos doesn't just depend on your camera's megapixels. High-quality optical glass is essential for capturing sharp details in your images. If your budget allows, investing in the best quality lens glass can make a significant difference.
Curious about more detailed recommendations on the best lens for photographing the Milky Way?
30.Use a sturdy tripod to get a tack sharp Milky Way
A sturdy tripod is essential, especially when using slow shutter speeds to prevent any unwanted motion blur.
Imagine you've just spent a chunk on a high-end camera; it only makes sense to pair it with a reliable tripod to ensure your setup can handle your Milky way photography settings.
Remember, long exposures are typical when shooting the stars, and a solid tripod is your best defense against ruining a shot with blur.
The importance of a robust tripod becomes even more apparent under challenging conditions like windy nights. Even slight movements can downgrade a potentially fantastic photo to just a mediocre one. Carbon fiber tripods are a top choice because they offer the stability needed without adding too much weight to your gear.
Oh, and don't get too attached to your shooting spot. If conditions aren't right, don't hesitate to pick up and move. Finding the perfect spot can sometimes make all the difference in getting that ideal shot.
31.Use an intervalometer to avoid vibrations

Photo by Tiberiu Scarlat
Struggling with blurry images in your night sky photography, even with a tripod? The problem might be camera shake during long exposure times, which is common in low-light settings like Milky Way photography.
Here's a tip: get an intervalometer.
This handy device lets you trigger your camera without touching it, eliminating shake from pressing the shutter button. Plus, if you're using a DSLR, combine it with the mirror lockup feature to further stabilize your shots at slow shutter speeds.
Don't have an intervalometer?
No worries.
Most mirrorless and DSLR cameras come with a built-in timer that also helps prevent shake.
Investing in an intervalometer is a smart move for any serious night sky photographer.
32.Bring a headlamp
When you're planning to photograph the Milky Way, having the right lighting is crucial, especially a versatile headlamp. It's not just about illuminating your path; it's about safety and functionality in the dark.
Use a bright headlamp to navigate to your location, but once you're set up, try to keep it off as much as possible to preserve your night vision. Your eyes take about 20 minutes to adjust to the dark, and using a bright light can disrupt this process.
Look for a headlamp with a dimmer to adjust the brightness, which helps you switch between settings without losing your night-adapted vision.
Also, be considerate of other photographers by using your light sparingly.
And don't forget to check your batteries or charge before heading out! ;)
33.When shooting at night, wear warm clothing

Photo by Mihail Minkov
Even during the summer, nights can get surprisingly cold, especially if you're in windy areas, up in the mountains, or out at dawn – the coldest time of the day.
When the air turns brisk and you can see your breath, the right approach to clothing is essential. The key is layering, which allows you to control your body temperature by adding or removing layers based on the weather. This strategy isn't just for winter; it's your best option anytime you face changing conditions.
To effectively dress for the cold, you need three specific layers:
Base layer. This is your first line of defense and should keep your skin dry. Long underwear is ideal as it wicks moisture away from your skin.
Middle layer. This layer retains heat. Opt for a fleece or a puffy jacket that traps body heat to keep you warm.
Outer layer. This is your shield against the elements. Your jacket should be waterproof and windproof, protecting you from rain and cutting winds.
Make sure these layers fit comfortably over one another without being too tight. If they're too snug, they can restrict movement and blood circulation, making adjustments difficult and uncomfortable.
Avoid cotton in any of these layers. Cotton absorbs moisture and dries slowly, increasing your risk of getting cold or even hypothermia. Instead, choose materials designed for performance and moisture management.
Lastly, don't hesitate to adjust your layers. Add your waterproof shell at the first hint of rain or wind, and shed your middle layer when you start to feel warm to avoid sweating. It's much easier to stay warm and dry than it is to get warm after you've gotten cold.
34.Bring spare batteries and keep them warm
Remember, the goal is to maximize your time under the Milky Way.
Unfortunately, the cold, enchanting nights under the stars can be harsh on your camera's batteries...
Cold temperatures reduce battery life, often at the most unexpected moments during your shoot. To prevent this, an essential strategy is to keep your batteries warm, ensuring they retain their charge for as long as possible.
Always carry spare batteries and store them in a place where they can benefit from your body heat. A practical method is to keep them in a zip-lock bag tucked inside an inner pocket of your jacket, close to your body. This warmth can significantly slow down the rate at which your batteries deplete.
35.Keep your lens warm to prevent condensation
When you're out capturing stunning landscapes, camera lens fogging can occur due to condensation.
This happens when your lens is exposed to dramatic changes in temperature and humidity. For example, moving from a cold outside environment into a warm indoor setting can cause your lens to fog up.
Basically, condensation forms when the temperature of your camera drops below the dew point inside the lens, causing water vapor to turn into liquid.
However, this doesn't mean your camera is ruined. But you can't shoot with it for a while.
And that's going to ruin the shooting session that you carefully planned! :(
It's essential to prevent condensation by using methods like keeping your camera warm, using protective covers, or allowing your gear to acclimatize to temperature changes gradually.
If condensation occurs, don't detach the lens; instead, try to gently warm your camera to evaporate the moisture. Using silica gel packets or dehumidifiers in your camera bag can also help absorb moisture.
36.Light paint the landscape

Photo by Tim Schallberger
If you want to give your Milky Way images a sense of place, add depth and shadows, you should light paint the foreground. To have a more natural looking image, make sure the artificial light is subtle and has a low intensity. This is absolutely necessary on New Moon or thin Moon days.
On the contrary, as the Moon phase reaches Full Moon, the Moonlight might be enough to light the landscape.
Pictures made with side lighting usually have harsh shadows and more contrast. To brighten the shadows and reduce the contrast, you may want to use different techniques:
Light painting. Moving a light source during a long exposure to selectively illuminate large or complex subjects, offering control over lighting fall-off.
Low-level lighting. Employing dim LED panels to illuminate the foreground. This technique avoids blending by matching the exposure for both the sky and the foreground, aiming for subtle lighting effects.
The cool thing about low-level lighting techniques is that they enhance detail and visibility in the foreground of nightscapes while maintaining good quality in the sky, addressing common issues with dark foregrounds in night photography.
These methods involve using subtle, artistic low-level lighting to avoid artificial appearances in photos, preferring to mimic natural moonlight effects.
The benefits of using low-level lighting are:
Consistency. Low-level lighting provides consistent illumination during all camera exposures, which is ideal for maintaining uniform lighting across multiple shots in panoramas.
Stacking compatibility. Since the lighting is constant, it facilitates stacking multiple exposures to reduce noise and enhance detail without creating discrepancies in lighting between the stacked images.
If you want to learn all you need to know about low-level lighting (LLL), watch our Masterclass with Royce Bair.
37.Make sure you're at the the exact shooting spot
Taking the perfect Milky Way photograph requires precise positioning and preparation.
Arrive at your photo location early (1)
This extra time is crucial as it allows you to thoroughly scout the area. You need to find the exact spot from which to shoot, ensuring that when the Milky Way rises, it's exactly where you want it in your frame.
Once you're on site, take some time to scout the terrain (2)
Confirm that the conditions – like lighting and background – are ideal for the shot you envision. This initial check can save you from last-minute surprises that might ruin your photo.
Make sure you're at the right spot to take your shot (3)
Open PhotoPills and use the (+) button to activate your position on the map. Look for the compass icon – it'll help you orient yourself. You should see a blue circle on the map indicating your location.
Now, head towards the Red Pin on your map. This pin marks your ideal shooting point. To align yourself perfectly with the Red Pin, zoom in on the map and ensure the blue dot (your position) is directly at the base of the pin.
Even if you're a few meters off, don't worry. As I told you in tip #11, you can always adjust your position slightly to perfect your composition when the Milky Way appears.
38.Be ready to work fast

Photo by Dominik Kuznik
When you're out shooting the night sky, especially aiming to capture the Milky Way, timing and speed are essential.
First, be aware of the Milky Way's position.
Even though it's billions of miles away and appears almost stationary in our sky, small movements on your part can disrupt the perfect alignment with your subject on the ground. If you notice the alignment is off, simply adjust your position slightly. This repositioning helps maintain the Galactic Center exactly where you want it in your frame.
But what if you've got your shot and then spot a better angle or composition?
That's when you should quickly recompose the scene.
A useful tip here is to increase your camera's ISO setting. By doing so, you can rapidly take multiple "photo sketches". These quick shots allow you to experiment with different compositions without wasting time.
And remember, practice makes perfect. Try shooting in various conditions and not just when everything seems ideal.
39.Switch off the lens stabilization option
As a rule of thumb, I always recommend that you switch the lens stabilization system off when using a tripod.
Some lenses include a function to stabilize vibrations. Canon, for example, calls it Image Stabilization (IS), while Nikon calls it Vibration Reduction (VR), and Sigma, Optical Stabilizer (OS). Other brands, such as Sony, Olympus and Pentax have been pushing for in-camera stabilization.
The lens stabilization system allows you to shoot handheld in low light conditions at shutter speeds slower than usual without getting a blurred image. This is possible because the lens compensates the vibrations you produce.
When using a tripod, you should turn off this function. Even without camera vibrations or movement, the image stabilization system (made of small gyroscopes) might try to correct nonexistent movements, causing vibrations that may negatively affect the sharpness of the image, especially when shooting at long shutter speeds.
40.Use the widest aperture possible

Photo by Pietro Carbucicchio
Aperture affects how much light you capture and the depth of detail in your photos.
Ideally, you should use an aperture setting between f/1.4 and f/2.8. This range helps you get the best balance of light and detail, especially under darker conditions like when shooting the Milky Way.
In this sense, the optimal lens to use is one that offers an aperture of f/2.8 or lower.
A lens with such an aperture makes it significantly easier to capture stunning images of the galaxy. It allows more light to hit the sensor, which is particularly important in low-light settings where the Milky Way is visible.
However, if you don't have a lens with an aperture as fast as f/2.8, don't worry. You can still take amazing photos of the Milky Way, just open the diaphragm as much as you can – use the lowest possible f number on your lens.
A faster lens simply makes the process a bit easier, but great results are still achievable with a bit narrower aperture settings.
41.Focus at the hyperfocal if you're using a wide angle lens

Using a wide-angle lens?
To achieve the clearest shots with maximum depth of field, focus at the hyperfocal distance.
This technique ensures everything from halfway to this point right out to infinity remains sharp. It's especially handy for capturing extensive landscapes in crisp detail.
A quick tip: aim a tad beyond the hyperfocal distance – say, about 1 meter – to guarantee sharpness from the foreground to distant objects like the Milky Way.
Want to master this in under a minute? Check out the video below where I demonstrate exactly how to focus to the hyperfocal distance quickly and efficiently.
42.Frame using the highest ISO available in your camera
Frame using the ISO.
Don't be afraid to crank up the ISO. Set the ISO to the maximum value.
Then, take as many shots as necessary until you adjust the framing to the composition you're looking for.
Don't worry about the noise resulting from using a high ISO. The idea here is to take advantage of it while using a very fast shutter speed. This will allow you to adjust your composition fast and then keep working on the following settings to shoot the Milky Way.
43.Adjust the shutter speed using the NPF rule to avoid star trails


To do so, go to PhotoPills and open the Spot stars calculator.
Once there, choose your camera and set
- The focal length,
- The aperture,
- The minimum declination of the stars (set 0º if you don't know)
- The accuracy mode (default is the best option in most cases).
On the table of results you get two values: the NPF rule and the 500 rule.
The NPF rule gives you a more accurate value than the 500 rule. It even takes into account the megapixels of your camera.
44.Make sure both your subject and the Milky Way are in focus
When taking photos of both a subject and the Milky Way, aim to keep them both in sharp focus.
This is possible if you check that the hyperfocal distance is shorter than the distance to your subject. If the subject is positioned beyond the hyperfocal distance, the Milky Way will also appear sharp in your shot.
This technique doesn't work in every situation, but it's worth a try to capture stunning, crisp images of both your foreground interest and the stars.
Alternatively, you can focus on a star or do a focus stacking.
Using one or another will depend on what you want as a photographer and in the scene you're photographing.
Check the video below to learn more about the 3 most used ways to make focus when photographing the Milky Way.
45.Use the Live View mode to focus accurately
Capturing a sharp image of the Milky Way using your camera's Live View function on the LCD is a great way to ensure precision.
Start by zooming in on a star through the Live View.
You'll want to slowly adjust the focus ring until the star appears as small as possible. If you're new to manual focusing, gently turn the focus ring until the star appears as a pinpoint.
If you overshoot, simply reverse a bit to fine-tune the focus.
After taking your shot, check the image by zooming in on the LCD screen. If the Milky Way's details look soft (the stars aren't big bright spots), you might need to adjust the focus and try again.
This method lets you see and correct your focus in real time, helping you get that perfect Milky Way shot!
46.Use the Focus Peaking and/or the Focus Magnifier functions

Photo by César Álvarez
Your camera's advanced features like Focus Peaking and Focus Magnifier can be game-changers. Use these functions for sharp, breathtaking astrophotography.
Using Focus Peaking for sharp stars
Focus Peaking is a helpful tool that highlights the edges of objects in focus with a colored overlay. Most cameras let you customize both the color and intensity of this overlay.
While I prefer using red for its visibility, you might find other colors like yellow or blue work better depending on your subject and lighting conditions.
To start, mount your camera on a tripod and aim it at a star.
As you adjust the focus, the areas in sharp focus will be highlighted in the color you selected. The brightest setting makes it easier to see the highlights but can be a bit distracting.
It might take a few tries to get everything perfectly sharp, so patience is key. If you're new to using Focus Peaking, take your time to practice.
Mastering the Focus Magnifier tool
The Focus Magnifier function zooms in on a central portion of your image to help you fine-tune your focus more precisely.
After framing your shot, press a dedicated button (usually found on your camera's control wheel or joystick) to activate this feature. You can then use the controls to move the zoomed-in section around the screen.
Once you've magnified the desired area, slowly adjust the focus ring until the section is crystal clear.
Be careful not to move the focus ring after achieving the perfect focus to avoid blurring your shot.
47.Do an exposure bracketing for difficult lighting conditions

Photo by Lukas Vesely
High Dynamic Range (HDR) techniques are often used in astrophotography to capture both dim and bright parts of a scene.
One of these techniques is exposure bracketing.
Bracketing is used to manage exposure levels to ensure optimal photo quality, especially under challenging light conditions or during ephemeral events like Milky Way alignments.
For challenging lighting conditions, bracket your exposures to capture different levels of detail in the Milky Way and foreground.
Bracketing involves taking multiple shots at varying exposures to capture a wide dynamic range. Each exposure will have different settings (e.g., changing ISO or shutter speed) to ensure you have a range of options to work with during post-processing.
A 1-stop bracketing of 3 shots will be enough in most situations. In other words, you capture a standard image, a darker/underexposed version, and a brighter/overexposed version.
And don't forget to use a tripod while shooting your bracketed exposures. It will help you achieve a precise alignment, which you'll need afterwards in post-processing.
48.Use a star tracker
Investing in a star tracker can greatly enhance the quality of your Milky Way and other celestial photographs, making it a worthy addition to any astrophotographer's toolkit
What is a star tracker?
A star tracker is a device used in astrophotography that compensates for the Earth's rotation by moving the camera at the same rate as the stars across the sky.
When you're photographing celestial objects like stars or the Milky Way, you'll need to shoot long exposures to capture enough light.
However, because the Earth rotates, long exposures without tracking can result in Star Trails – where stars appear as streaks rather than sharp points. A star tracker rotates the camera at the same rate as the Earth but in the opposite direction, effectively neutralizing the motion of the stars relative to the camera. This allows for much longer exposure times without the stars appearing to move.
Why do you need a star tracker for Milky Way photography?
Sharp stars. A star tracker ensures that the stars appear as sharp points, enhancing the clarity and detail of the Milky Way in your photos.
Increased detail and depth. You can shoot longer exposures without star movement, which means more light and more details can be captured from faint stars and the Milky Way's structure. This results in photographs with greater depth and detail.
Lower ISO settings. With the ability to take longer exposures, you can reduce the camera's ISO setting. Lower ISO reduces the noise in the final images, resulting in cleaner and higher-quality photos.
More creative control. A star tracker gives you more flexibility in experimenting with different exposure times, apertures, and compositions without worrying about the motion blur of stars.
Useful to merge exposures. For advanced techniques like stacking images to reduce noise or increase dynamic range, having multiple long exposures with sharp stars is invaluable.
If you want to learn all you need to know about using a star tracker to shoot the Milky Way, watch our Masterclass with Dan Zafra.
49.Take multiple exposures for stacking or creating composites

Photo by Adam Wierzchowski
Do you want to capture detailed foregrounds in your Milky Way photos?
I've already told you that you can use artificial lightning to illuminate the foreground (tip #36).
But there's another technique that will do the trick – shooting multiple exposures to blend them later in post-processing.
Use natural light transitions, like during blue hour or Moonlight, to enhance foreground lightness.
I suggest you multiple approaches:
Blue hour blend. Capture the foreground during the blue hour and the Milky Way after dark without moving the camera, and then blend the exposures in Photoshop. This method allows for a deeper depth of field and can reduce or eliminate the need for focus stacking.
Moonlight shooting. Use Moonlight (ranging from 25% to 60% illumination) to naturally light the foreground to capture both the landscape and the Milky Way at the same time, reducing the need for exposure adjustments.
Long exposures with starlight. Use significantly longer exposures to capture ambient starlight for the foreground. You can then combine it with exposure stacking to reduce noise.
As a rule of thumb, I recommend you to shoot blends (taking parts of the image at different time periods without moving the tripod), as you'll find it emotionally more rewarding to look at an image as you have experienced that environment.
50.Make sure that Antares or Mars look like the red giant superstars they are
Both Antares and Mars are naturally red in color.
- Antares is a red supergiant star, one of the brightest in the night sky, and its distinct red color is due to its cooler surface temperature compared to hotter blue stars.
- Mars is known as the "Red Planet" due to iron oxide (rust) on its surface, which gives it a reddish appearance.
Ensuring that these colors are accurately represented in your Milky Way photos helps in maintaining the authenticity of astronomical objects as seen through telescopes or the naked eye:
Show the stars' temperature and composition (1)
The color of a star in astrophotography can indicate its temperature and composition. Red stars, like Antares, are cooler compared to the blue or white stars, which are hotter. Showcasing Antares' red color correctly can provide insights into its physical characteristics and stage in the stellar lifecycle (Antares, being a red supergiant, is in a late stage of its life).
Create visual contrast (2)
Capturing the contrast between different colors in the night sky can enhance the visual appeal of the images. Red objects like Mars and Antares can provide beautiful contrast against the cooler tones of the Milky Way's star field and the dark sky, making your images more striking and engaging.
Maintain post-processing integrity (3)
Ensuring that the red hues of Mars and Antares are preserved and correctly enhanced in post-processing reaffirms your skills and integrity in astrophotography. Over-processing that leads to color inaccuracies can mislead viewers about the true nature of these celestial bodies.
51.Let's go capture the Milky Way together!
Alright, fellow PhotoPiller!
Get ready to capture the Milky Way like never before. Thanks to these 50 expert tips, you have everything you need to photograph the Milky Way successfully.
Now it's time to let your imagination run wild. All you need is a great idea. Plan it out using the magic of PhotoPills, and you'll be ready to shoot in no time.
Remember, each Milky Way photo is an adventure – a chance to tell a story. And the best part? You'll have an unforgettable experience behind every shot.
So go ahead, chase that perfect Milky Way picture you've been dreaming of. Make your vision a reality, and don't forget to share the experience with your friends.
Oh, and one more thing – don't let those stunning Milky Way photos collect dust on your hard drive. Share them with the PhotoPills tribe! You never know, you might just get featured in the PhotoPills Awards and win an incredible prize.
So what are you waiting for?
Grab your camera, plan your shot, and let's go capture the Milky Way together!
Note: Some links on this page are affiliate links. What does this mean? If you buy/rent using these links you're helping support us and it costs you nothing extra. Thank you for your support.
Get this ebook for free now!