Ultimate Milky Way photography cheat sheet for beginners
The Milky Way photography cheat sheet that I'm about to share is perfect if you're brand-new to astrophotography.
The truth is night photography techniques can differ a lot based on what you want to capture. For example, the tricks for snapping the Milky Way won't work for photographing a Moonrise or the Northern Lights. You could fill libraries with books on the countless combinations of scenes, gear, and settings.
It might seem overwhelming, but don't worry – getting started is simpler than it looks with a few basic tips.
I'll share everything I know.
The idea here is to give you a fast and easy reference tool to get the perfect Milky Way shot.
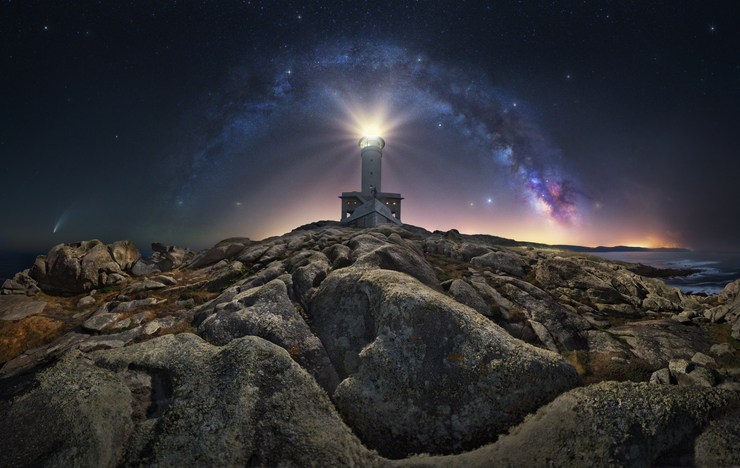
Like the photo I used as a cover for this article, taken by John Meragias.
This Milky Way cheat sheet provides a great starting point to dial in those camera settings for a successful night skies photography experience:
The work of the best Milky Way photographers to learn from their craft.
A comprehensive guide to master the Milky Way photography settings.
And if you want to keep learning (which is something I always recommend), have a look at the following guides:
As with any photography genre, Milky Way photography requires to follow a certain workflow to make sure you get the shot at the best results possible. If this sounds like something you need help with, this photography cheat sheet is definitely for you.
Aren't you curious about it?
"Every problem is a gift – without problems we would not grow." - Tony Robbins
Get this ebook for free now!
Content
- Find inspiration and imagine your Milky Way picture
- Plan your Milky Way shot to the last detail
- Use the best gear for Milky Way photography
- Shoot your Milky Way photo successfully
- Take your Milky Way shots to the next level
1.Find inspiration and imagine your Milky Way picture

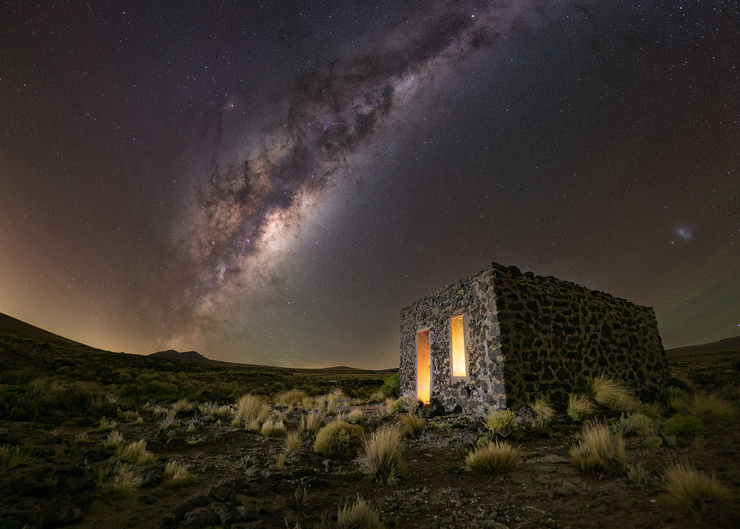
Photo by Efrén Yanes
Finding inspiration often comes down to having a regular routine and habits that keep our creativity flowing.
Ideas can come from anywhere. You might get one while reading this article or checking out your favorite photographers online. The key is to have a few habits, routines, and tricks up your sleeve that you can count on when you need a creative boost.
Your mindset can influence whether you should look for inspiration from different places. Sometimes, you might need a break from all the information overload.
Notice how you feel when you follow other photographers on social media. Does it light a spark and get your creative juices flowing? Or do you end up feeling drained from all the comparing and constant updates?
Being always connected isn't always the best thing. It's a good idea to be intentional. Choose what feels helpful and good for your well-being.
So, here are two ways you can find inspiration over the years:
Hopefully, these tips will help you keep doing what you love most: taking photos.
2.Plan your Milky Way shot to the last detail


I suggest you try using PhotoPills to plan any photo of the Milky Way that you imagine. It's a very powerful app!
If you want to master Milky Way photography planning, read the following guide: How to plan a Milky Way shot.
Plan your Milky Way picture from home with the Planner
In the next video Rafael will teach you...
- How to easily plan the best possible Milky Way photo for a given date with PhotoPills.
- And if you know the photo you want to take but don't know when it happens, you'll learn to determine the exact date and time that the Milky Way will be exactly where you want it to be.
To plan a photo of the Milky Way you have to follow these steps:
Place the Red Pin on a potential location.
Set the date of the photo.
Activate the Milky Way layer.
Change the time with the Time bar until the Milky Way is in the position you want.
Move the Red Pin to adjust the shooting spot.
Save the plan using the Save button.
When you're in the field, at the Red Pin position, use the Augmented Reality view (AR) on the Planner to visualize on your smartphone where the Milky Way will be.
You have a step by step guide in section 7 of our Milky Way photography guide.
Plan your Milky Way picture in the field with the Night AR view
Here you have a short video where Rafael explains how to plan a picture of the Milky Way in 1 minute with the Night Augmented Reality view:
Plan a Milky Way shot with the Moon
Have a look at the video below, where Rafa gives you the Milky Way photography cheat sheet to to have the Moon with the right phase and the right position in the sky to help you correctly expose both the Milky Way and your foreground in a single shot.
Here are the steps you should follow to plan any Milky Way picture with the Moon above the horizon.
Switch on the Milky Way layer.
Set the New Moon date.
Place the Red Pin near the subject.
Find the shooting time.
Find the shooting spot.
Swipe the Time Bar until you get the date the Moon is at the position you want.
When you're in the field, at the Red Pin position, use the Augmented Reality view (AR) on the Planner to visualize on your smartphone where the Moon will be.
Plan a Milky Way shot that you can capture in winter
Here's a video in which Rafa gives you the Milky Way photography cheat sheet you need to plan any Milky Way picture you imagine during the winter:
Here are the steps you should follow to plan a winter Milky Way.
Place the Red Pin next to the subject.
Set the shooting date.
Switch on the Milky Way layer.
Find the shooting time.
Find the shooting spot.
Plan the field of view (FoV).
When you're in the field, at the Red Pin position, use the Augmented Reality view (AR) on the Planner to visualize on your smartphone where the Milky Way will be.
3.Use the best gear for Milky Way photography

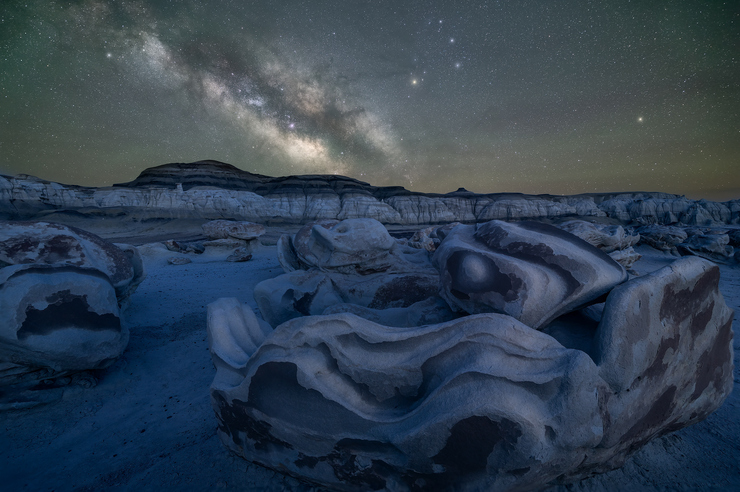
Photo by Mikel Iraeta
The process of photographing the Milky Way starts with your choice of camera gear. Not all cameras and lenses are ideal Milky Way photography.
Here's a Milky Way photography cheat sheet with everything you need.
Consider the best camera to take photos of the Milky Way
Don't fret if you think you need to break the bank to capture the Milky Way – that's not necessarily the case! :D
The best camera is the one you have with you.
What is the best camera for Milky Way photography?
Through extensive testing and comparison of various camera bodies, here are my top picks for cameras that excel at Milky Way photography:
How to choose the best camera to take photos of the Milky Way?
To capture the Milky Way in all its luminous detail, ensure your camera:
- Is equipped with a sensor capable of capturing high dynamic range. This means it can handle the extreme contrasts between the darkest and brightest areas of the night sky.
- Minimizes noise, especially at higher ISO settings, which is crucial for clear, crisp night sky images.
- Offers good resolution to ensure that the fine details of the stars and the galaxy are visible.
- Includes some form of stabilization technology to help keep your shots sharp during long exposures.
Here you can find more information on the best camera for Milky Way photography.
Choose the best lens for shooting the Milky Way
No matter how many megapixels your camera has, the quality of your lens is crucial for nailing those Milky Way shots.
But don't worry.
The best lens is the one you have, the shorter and faster the better...
What is the best lens to shoot the Milky Way?
After years testing and comparing many camera lenses these are, in my opinion, the best lenses to photograph the Milky Way:
- Nikon AF-S 14-24mm f/2.8G ED (DSLR) and Nikkor Z 14-24mm f/2.8 S (mirrorless).
- Sony FE 24mm f/1.4 GM.
- Canon EF 16-35mm f/2.8L III USM (DSLR) and Canon RF 15-35mm f/2.8 L IS USM (mirrorless).
- Fujifilm XF 18mm f/1.4 R LM WR.
- Sigma 14mm f/1.8 DG HSM Art.
How to choose the best lens for Milky Way photography?
To nail your Milky Way photos, make sure your lens is:
- Very fast (f number as low as possible).
- Short.
- Not distorting a lot.
- Not vignetting too much.
- Not affected by coma.
Here is everything you need to know about the best lens for shooting the Milky Way.
Complete your Milky Way photography gear
I just gave my opinion on the features your camera and lens should have to get your Milky Way picture.
But apart from the camera and the lens, you're going to need a few more pieces of gear. They'll surely prove extremely helpful.
1. PhotoPills is the best planning and shooting app you can have in your pocket. Seriously, check it out.
2. A camera that
- Has a sensor that can capture a wide dynamic range.
- Keeps noise to a minimum, especially at higher ISO settings.
- Offers good resolution.
- Comes with some sort of stabilization tech.
3. A lens that's
- Super fast (the lower the f-number, the better).
- Short.
- Minimizes distortion.
- Doesn't create too much vignetting.
- Isn't affected by coma.
4. A sturdy tripod and head that is
- Tall enough for you.
- Capable of supporting your camera and lens.
5. An intervalometer.
6. Plenty of memory cards.
7. A powerful headlamp. Handy when shooting at night.
8. A star tracker (optional but cool to have).
Find out more about the best Milky Way photography gear.
4.Shoot your Milky Way photo successfully

Photo by Marcin Zajac
Photographing the Milky Way requires a little knowledge about the correct camera settings, the shooting workflow you should follow, and some tips for nailing the shot.
Here's a Milky Way photography cheat sheet including all the steps you need to follow to successfully capture the Milky Way shot you've imagined.
Dominate the Milky Way photography settings
Once you have all your equipment in order, it's time to set up your camera to capture the perfect shot.
To photograph the Milky Way you'll need complete control over your settings, so it's best to work in manual mode.
Here are my recommended Milky Way photography settings:
Set the shooting mode to Manual (M).
Set the shortest focal length you can: always <35mm, ideally 14-24mm.
Set the largest aperture you can: between f/1.4 and f/2.8.
Focus at the hyperfocal distance.
Frame using the highest ISO available in your camera.
Adjust the shutter speed using the NPF rule: between 8s and 20s.
Fine tune the ISO: keep it between 3200 and 6400.
Set the white balance to 3900K.
Take a test shot and check the histogram.
Read a step by step guide to master Milky Way photography settings.
How to take a picture of the Milky Way
If you want to learn how to take a picture of the Milky Way, follow the steps below:
Get to your shooting spot in advance.
Place the tripod at the shooting spot.
Prepare your gear.
Set the shooting mode to Manual (M).
Set the shortest focal length you can (<35mm).
Set the largest aperture you can.
Focus at the hyperfocal distance.
Frame using the highest ISO available in your camera.
Adjust the shutter speed using the NPF rule rule.
Fine tune the ISO.
Set the white balance to 3900K.
Take a test shot, check the histogram.
Read the complete workflow you need to follow to successfully take a picture of the Milky Way.
Take advantage of these 50 tips for photographing the Milky Way
Milky Way photography, although not overly difficult, comes with its challenges during the planning phase (here's where the PhotoPills app comes to your rescue) and on the shooting day.
Practice and experimentation are key in improving your Milky Way photography skills, so let me tell you my favorite 50 tips for photographing the Milky Way:
Find inspiration looking at the best Milky Way pictures
Get inspired by the best Milky Way photographers
Capture all types of Milky Way
Capture a panorama of the Milky Way arch
Capture the Milky Way with other phenomena
Plan your photography around the galactic core
Plan a Milky Way shot that you can capture in winter
Know the direction where to point your camera to
Plan your shot on a (near) Moonless night
Plan a Milky Way shot with the Moon
Understand the Milky Way position in the sky
Finding out the Milky Way position relative to the subject
Understand the Moon position in the sky
Finding out the Moon position relative to the subject
Find a dark location
Find an interesting subject
Decide your composition
Look for a location with space to move around
Scout the shooting location during the day
Respect the restrictions (if any)
Use PhotoPills' AR views to confirm the Milky Way's position in the sky
Check the weather forecast
Never give up
Use the best planning tool
Know the height of your subject
Take the mountains into account when planning your shot
Use the best camera for Milky Way shots (the one you already have!)
You can also use an astromodified camera
Use the best lens for Milky Way photography (any short lens will do!)
Use a sturdy tripod to get a tack sharp Milky Way
Use an intervalometer to avoid vibrations
Bring a headlamp
When shooting at night, wear warm clothing
Bring spare batteries and keep them warm
Keep your lens warm to prevent condensation
Light paint the landscape
Make sure you're at the the exact shooting spot
Be ready to work fast
Switch on the lens stabilization option when it's windy
Use the widest aperture possible
Focus at the hyperfocal if you're using a wide angle lens
Frame using the highest ISO available in your camera
Adjust the shutter speed using the NPF rule
Make sure both your subject and the Milky Way are in focus
Use the Live View mode to focus accurately
Use the Focus Peaking and/or the Focus Magnifier functions
Do an exposure bracketing for difficult lighting conditions
Use a star tracker
Take multiple exposures for stacking or creating composites later
Make sure that Antares or Mars look like the red giant superstars they are
5.Take your Milky Way shots to the next level
And that's a wrap!
You've got everything you need to elevate your Milky Way shots with this handy cheat sheet:
- Tons of inspiration to get your creative juices flowing.
- Step-by-step plans using PhotoPills to make your photoshoot a breeze.
- The best camera gear and a solid workflow to ensure a successful shooting session.
This is just a quick overview, so feel free to dive deeper into each topic. Click on the links to explore our detailed articles on Milky Way photography, packed with practical and easy-to-follow tips.
Taking stunning Milky Way photos isn't as hard as it seems. You just need to know the right steps and timing!
I hope this cheat sheet helps you become a fantastic Milky Way photographer.
Now it's your turn...
Start planning an awe-inspiring Milky Way shot and keep at it until you nail it! :)
Note: Some links on this page are affiliate links. What does this mean? If you buy/rent using these links you're helping support us and it costs you nothing extra. Thank you for your support.
Get this ebook for free now!