What is the best Milky Way photography gear? (2024)
Capturing the Milky Way in all its glory is a dream for many photographers. As you've surely seen before, the twinkling stars set against the dark night sky create a mesmerizing scene that feels almost magical.
However, achieving those stunning shots requires the right gear, especially if you're just starting.
The good news is that the best camera equipment for Milky Way photography is the one you already have.
In this guide, I'll walk you through the essential equipment you'll need to embark on your Milky Way photography journey. With the right tools and a bit of practice, you'll be well on your way to capturing breathtaking images.
Having said that, there's something extremely important that you should always keep in mind...
Without ideas, there are no pictures. So think of an impressive shot. (Imagine)
Without a plan, there are no pictures. So plan your picture with PhotoPills. (Plan)
Without a shooting session, there are no pictures. So go to the location on the planned date and time and capture it. (Shoot!)
Just do like Matteo Rovatti, the author of the hypnotic picture I used as the cover of this article, who followed our motto.
You can read more about the workflow you should follow in our Milky Way photography guide.
Read it thoroughly, start practicing and after a while you'll become a Milky Way Master.
And if you want to keep learning (which is something I always recommend), have a look at the following guides:
- Photography Planning: The Definitive Guide.
- How to take a picture of the Milky Way.
- 50 tips for photographing the Milky Way.
But for now, let's have a look at what I consider the best Milky Way photography gear.
"The camera is an instrument that teaches people how to see without a camera." - Dorothea Lange
Get this ebook for free now!
Content
- What is the best Milky Way photography gear?
- Always rely on PhotoPills!
- What is the best camera for Milky Way photography?
- What is the best lens for shooting the Milky Way?
- Get a sturdy tripod and head
- You need an intervalometer
- Take enough memory cards
- A headlamp may be useful
- Use a star tracker (optional)
- Tips for choosing the right Milky Way photography gear
- Is it really all about the gear?
1.What is the best Milky Way photography gear?

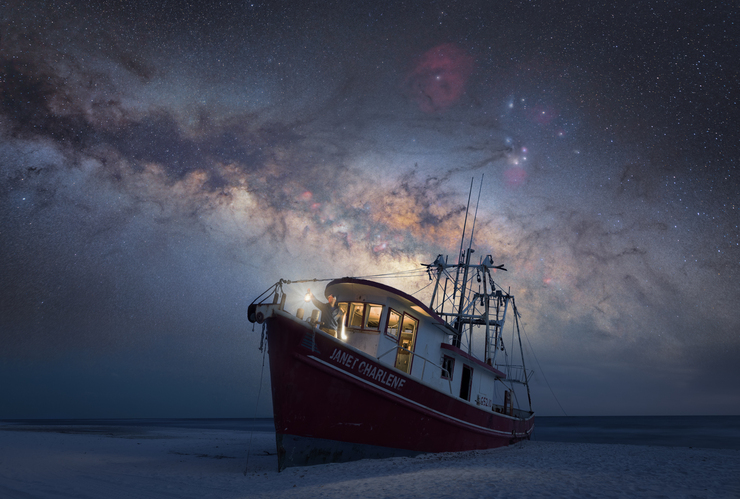
Photo by Alex Kelly
"Quick question Toni... What's the best Milky Way photography gear?"
Quick question for sure, but the answer might take a bit... :D
If you're in a hurry, here's a short and sweet camera gear list for you:
1. PhotoPills is the best planning and shooting app you can have in your pocket. Seriously, check it out.
2. A camera that
- Has a sensor that can capture a wide dynamic range.
- Keeps noise to a minimum, especially at higher ISO settings.
- Offers good resolution.
- Comes with some sort of stabilization tech.
3. A lens that's
- Super fast (the lower the f-number, the better).
- Short.
- Minimizes distortion.
- Doesn't create too much vignetting.
- Isn't affected by coma.
4. A sturdy tripod and head that is
- Tall enough for you.
- Capable of supporting your camera and lens.
5. An intervalometer.
6. Plenty of memory cards.
7. A powerful headlamp. Handy when shooting at night.
8. A star tracker (optional but cool to have).
But hang tight! Keep reading to get all the details on each piece of gear and what you really need to capture that perfect Milky Way shot.
2.Always rely on PhotoPills!


Have I mentioned that PhotoPills is like the Swiss Army knife for photographers?
You've probably heard me say it before because I genuinely believe it :)
My good friend and PhotoPills Master, Francesco Gola, nailed it with this definition a while back, and I couldn't agree more.
That's why PhotoPills is your ultimate piece of gear for Milky Way photography. It's unbeatable as:
- A planning tool.
- A shooting companion (helping you with composition and focus).
It's an incredibly affordable and powerful tool that you can use right from the get-go!
Let me explain how it can elevate your Milky Way photography sessions.
Take advantage of the planning tools (1)
Planning your Milky Way photos is super important. Seriously.
Why, you ask?
You'll dodge unexpected surprises and keep things (mostly) under control.
You'll always be in the right spot at the right time to snap that perfect shot.
And there's no better tool than PhotoPills to help you figure out if your idea is doable and nail down the three basics: where to shoot, when to shoot, and what time to shoot.
Depending on the kind of picture you're dreaming of, you'll need to follow a different game plan.
But here is a cheat sheet that I'm sure you'll find useful.
Nail your photo with the shooting features (2)
When taking a picture of the Milky Way, the most important decision is setting the shutter speed.
To keep the lightness of your picture (how light or dark it is), you need to balance the aperture, the shutter speed and the ISO.
In Milky Way photography, 2 conditions define your shutter speed:
- You need to keep the shutter open as much as possible to capture as much light as possible, and thus get more stars in the photo.
- You need to limit the exposure time to prevent stars from trailing, and thus get the stars as big bright spots.
Depending on the camera and settings you use, you should use a maximum shutter speed between 8-20s.
But it's best to calculate it accurately.
To work out the shutter speed for Milky Way you need, use the PhotoPills Spot Stars calculator.


To do so, go to PhotoPills and open the Spot stars calculator.
Once there, choose your camera and set
- The focal length.
- The aperture.
- The minimum declination of the stars (if you don't know, set it to 0º).
- The accuracy mode (default is the best option in most cases).
On the table of results you get two values: the NPF rule and the 500 rule.
Always use the value according to the NPF rule. It's much more accurate.
If you want to learn more about the NPF rule and the 500 rule, you should read section 9 of our Milky Way photography guide.
Here's a video in which Rafa explains how to make the most out of the Augmented Reality view (AR) when you're in the field:
To make sure you're at the right spot, follow these steps:
In the Planner, tap the (+) button on the map (lower right corner) and activate your position on the map (by tapping on the button with the GPS icon or arrowhead). A blue dot will appear on the map indicating the exact location you're in.
Now walk to where the Red Pin is. And make sure the blue dot is centered with the end of the Red Pin stick.
Then, use the Augmented Reality view (AR) on the Planner to visualize on your smartphone where the Milky Way will be.
3.What is the best camera for Milky Way photography?

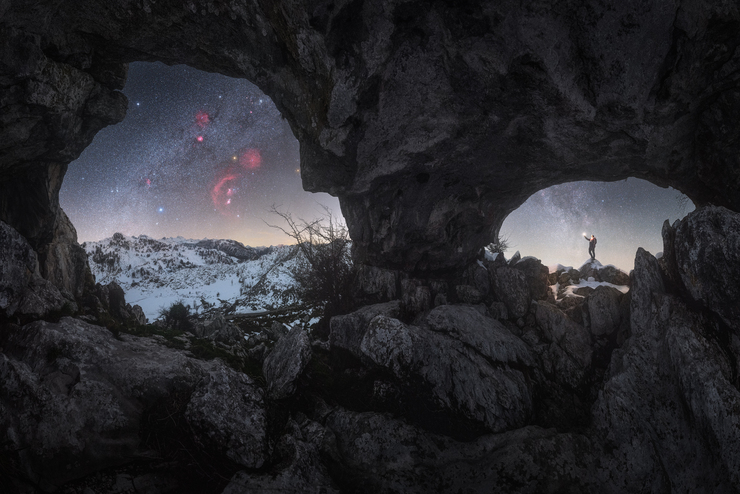
Photo by Abhisek Roy Chaudhuri
"OK Toni... What's the best camera for Milky Way photography?"
Don't fret if you think you need to break the bank to capture the Milky Way – that's not necessarily the case! :D
The best camera is the one you have with you.
You can read everything you need to know in this article about the best camera for Milky Way photography.
But here's a quick summary to get the best photography gear.
To capture the Milky Way in all its luminous detail, ensure your camera:
- Is equipped with a sensor capable of capturing high dynamic range. This means it can handle the extreme contrasts between the darkest and brightest areas of the night sky.
- Minimizes noise, especially at higher ISO settings, which is crucial for clear, crisp night sky images.
- Offers good resolution to ensure that the fine details of the stars and the galaxy are visible.
- Includes some form of stabilization technology to help keep your shots sharp during long exposures.
Through extensive testing and comparison of various camera bodies, here are my top picks for cameras that excel at Milky Way photography:
4.What is the best lens for shooting the Milky Way?

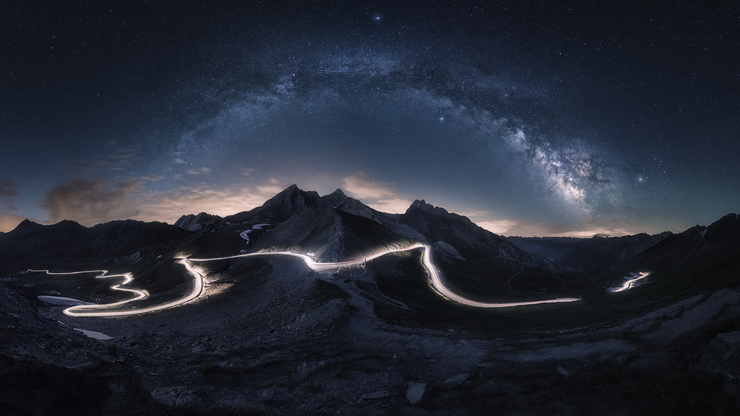
Photo by Alexandru Pastor
"Now that I know more about the camera, can you tell me what's the best lens for shooting the Milky Way?"
Sure!
But the answer is not very different :D
You can read everything you need to know in this article about the best lens for shooting the Milky Way.
But here's a quick summary to get the best camera gear.
The best lens is the one you have, the shorter and faster the better...
But...
To nail your Milky Way photos, make sure your lens is:
- Very fast (f number as low as possible).
- Short.
- Not distorting a lot.
- Not vignetting too much.
- Not affected by coma.
After years testing and comparing many camera lenses these are, in my opinion, the best lenses to photograph the Milky Way:
- Nikon AF-S 14-24mm f/2.8G ED (DSLR) and Nikkor Z 14-24mm f/2.8 S (mirrorless).
- Sony FE 24mm f/1.4 GM.
- Canon EF 16-35mm f/2.8L III USM (DSLR) and Canon RF 15-35mm f/2.8 L IS USM (mirrorless).
- Fujifilm XF 18mm f/1.4 R LM WR.
- Sigma 14mm f/1.8 DG HSM Art.
5.Get a sturdy tripod and head

Photo by Prince Berkoh
A sturdy and reliable tripod is what you need for your Milky Way photography session. A good tripod allows you to have the stability you need during long exposures, and will not be too affected by vibrations from you moving around.
The head should have a quick-release plate. It allows for easy attachment and detachment of your camera, making it perfect for travel and premium astrophotography trackers and mounts.
All in all, a good tripod and a ball head are essential Milky Way photography accessories.
Tripod and head recommendations
Choosing the best tripod can mean spending a little more money or being a bit clearer about the kind of photography you shoot.
In general, the key things to think about are the size and capacity of the tripod. In other words, how tall you need it to be, and how much weight you need it to carry.
Low-end tripod and head
The tricky part is making sure you get good quality even if you're on a tight budget.
When you're spending less, you probably won't get a carbon fiber tripod, which is both stronger and lighter. You'll also have to settle for a pretty basic ball head.
Do your best to invest in the highest quality gear your budget can handle. Stick with well-known brands like Benro and Manfrotto to make sure you're getting reliable stuff.
Mid-range tripod and head
One of my top tripod picks for students is the Manfrotto 055XPRO3. It's a fantastic all-around option that delivers great performance and functionality without breaking the bank.
Another great choice is the Travel line. These tripods are super reliable and won't disappoint.
If you can stretch your budget a bit, I'd definitely recommend going for a carbon fiber tripod. They offer the same strength and stability as aluminum ones, but they're much lighter – your back will thank you! Plus, they're a solid investment that can last you for decades.
Tripods from Gitzo, Induro or Really Right Stuff are also amazing choices and well worth considering.
High-end tripod and head
It's a well-known fact that lighter tripods tend to be pricier. But once you're in a certain price range, any of the carbon fiber tripods from the brands I mentioned will do a fantastic job.
Thinking about splurging a bit more? Go ahead and get yourself a quality tripod head.
A top-notch ball head can make a huge difference in your photography. It's definitely worth investing in one instead of sticking with the basic head that comes with your tripod.
The best ball heads provide excellent stability and smooth operation, are super easy to use, and are very portable.
My personal favorite is the Really Right Stuff BH-55.
I also really like the Gitzo GH1382QD, the Kirk Enterprises BH-1 and the Arca Swiss Monoball Z1 SP. They're all incredibly sturdy and reliable, allowing you to shoot with great precision.
Tripod tips when shooting the Milky Way
A tripod is the trusted tool of Millky Way photographers, so here are 3 pro tips on how to use your tripod for the best results!
Check the weight of your camera and lens combined and ensure your tripod is rated to handle at least that weight.
Keep your tripod as short as possible while still being able to use your camera comfortably. Only extend the legs as much as you need to, and extend the larger diameter sections first.
If your tripod isn't of very good quality, use a stationary object to rest against when taking the photo. But be careful, because the tiniest movements will show up in a photo like this.
6.You need an intervalometer

Photo by Juan María Coy
An intervalometer lets you snap a photo without touching your camera, making it perfect for capturing the Milky Way. It's definitely a must-have in your photography toolkit.
When you're photographing the Milky Way, it's crucial to avoid any contact with your camera. Even the smallest vibration can result in a blurry shot.
Some high-end cameras come with built-in intervalometers, which is super handy.
But if your camera doesn't have this feature, no worries! External intervalometers are a great alternative and can do the job just as well.
I usually recommend these great intervalometers:
- Pro intervalometer: SMDV.
- For cheap intervalometers check the brands Neewer, Phottix and Vello.
A great alternative is a device called CamRanger. Right now it's available for Nikon, Canon, Fuji and Sony cameras.
It's a stand-alone device that you connect to your DSLR or mirrorless camera with a USB cable. It creates an ad hoc WiFi network to which you can connect your smartphone, tablet or computer (iOS, Android, Mac and Windows). Thanks to the CamRanger application you can control your camera without a standard Internet connection.
Best of all, this device is independent. Therefore, if your mobile device loses its connection, the CamRanger has an internal memory to keep shooting.
Apart from this, you can:
- Set the camera settings from the remote device avoiding touching your camera equipment.
- View your shots on a large portable high resolution screen as you take them allowing you to check on the field that your subject is tack sharp.
It carries a hefty price tag considering what it is, but for photographers who want advanced control over their camera, it's the nicest option for doing so and worth the price.
7.Take enough memory cards

Photo by Mauro Cirigliano
Always pack a bunch of memory cards with your photo gear. Trust me, you'll need them.
Having the right memory card for your camera is crucial to make the most out of your photography sessions. With so many options in terms of speed, capacity, brand, compatibility, and price, it's easy to feel overwhelmed. But don't worry, I've got some tips to help you choose the best one for your needs:
Figure out what type of memory card your camera uses.
Decide how much storage capacity you need.
Pick the right speed for your memory card.
Types of memory cards (1)
First things first, check your camera's specifications before buying any memory card. Here are the main types:
- CompactFlash (CF): One of the earliest formats, once top-notch in speed and capacity, but now outpaced by newer formats.
- SD Cards: The most common format, available in several versions:
- SDHC (Secure Digital High Capacity): Stores between 2GB and 32GB.
- SDXC (Secure Digital ‘Xtra Capacity'): Holds 32GB to 2TB.
- SDUC (Secure Digital Ultra Capacity): The latest, ranging from 2TB to 128TB.
- XQD (or Express Card): A high-speed card developed to succeed CompactFlash.
- CFexpress: Even faster and better, available in three types:
- Type A: Slightly smaller and thicker than a standard SD card.
- Type B: Same shape as XQD cards.
- Type C: Larger and thicker than CompactFlash; no cameras use this type yet.
Memory card capacity (2)
Choosing the right capacity depends on your shooting habits. If you take hundreds of photos without offloading them to your computer, go for a bigger card. High-end cameras (full frame or medium format) produce large image files, sometimes over 50MB each, so they also need more storage.
While prices for some types (especially SD Cards and XQD cards) have dropped, I prefer using medium capacity cards (around 32GB). This way, if a card fails or gets lost (fingers crossed it doesn't!), you won't lose too many pictures.
Memory card speed (3)
You might think the fastest card is always the best, but it depends on your camera and shooting style. If you shoot in burst mode, you need a card with a fast write speed to prevent the buffer from clogging up. However, not all cameras support all speeds, so double-check compatibility before buying.
A card that writes images quickly is great, but if it's faster than your camera can handle, you're just paying for extra speed you can't use. And while the fastest cards are awesome, they can be pricey.
8.A headlamp may be useful

Photo by Josué Montoya
Milky Way photography often means you'll find yourself arriving at or leaving the location in the middle of the night. Even with the Moon out, it can still be pretty tricky to see.
No matter what kind of shot you're aiming for, you'll need to either:
- Get to your spot before dawn.
- Head out after dusk.
(Or both if you're planning an all-night shoot!)
This means you'll be setting up or packing up your gear in the dark. Or just walking around in the dark.
That's why bringing a headlamp is a game-changer. It's a piece of gear that makes everything easier, and you'll be glad you have it.
Any headlamp will do the job for Milky Way photography.
But my favorite ones are the Led Lenser SEO5, the H14R or the H7R.2.
Versatility and a compact design are the keys to a durable flashlight worth every cent. My favorites are the Coast TX-10, the Led Lenser L7 or the Maglite Mini.
9.Use a star tracker (optional)
Using a star tracker for astrophotography can significantly enhance your night sky images. Star trackers compensate for the Earth's rotation, allowing longer exposures without star trails. This results in sharper, more detailed images with less noise and richer colors.
Star trackers help reduce digital noise by allowing for lower ISO settings and improve image quality by closing the aperture, resulting in sharper and more detailed photos.
Start with wider focal lengths to simplify the process and gradually move to more complex setups.
Pick a star tracker that fits your skill level and what you need it for:
- If you're into long hikes, go for a lightweight option like the MSM Rotator, Star Adventurer Mini, or iOptron Skytracker Pro.
- But if you're mostly setting up in easy-to-reach spots, you can go with a standard tracker like the iOptron Skyguider Pro, Sky-Watcher Star Adventurer Pro 2i, or Benro Polaris.
10.Tips for choosing the right Milky Way photography gear
When starting with Milky Way photography, it's essential to prioritize your gear purchases.
Here are some tips to help you make informed decisions:
Start with the basics. Focus on getting a good camera, lens, and tripod first. These are the core components of your setup.
Set a budget. Photography gear can get expensive quickly. Determine how much you're willing to spend and look for deals or second-hand options to save money.
Do some research reading reviews. Read reviews and watch videos to understand how different gear performs in real-world conditions. This can help you make better choices.
Try before you buy. If possible, borrow or rent gear to test it out before making a purchase. This can give you a feel for what works best for you.
Investing in quality gear from the start can save you time and money in the long run.
11.Is it really all about the gear?
So... Is it really all about the gear?
Spoiler alert: It's not.
Now, I've got a little confession to make – I'm a bit of a gear junkie. Over the years, I've accumulated a ton of cameras, lenses, filters, accessories, and more lighting gear than I care to admit. But here I am, telling you to do as I say, not as I do! XD
Why?
Because with time, I've (hopefully) gotten wiser. I don't want you to fall into the same trap I did. For a while, I thought I had to upgrade my camera every time a new model came out to take the best photos.
Guess what? That's just not true.
Your gear should be at the bottom of your priority list. Focus instead on learning the ropes – things like planning your shots, scouting locations, and mastering shooting techniques. Practice really makes perfect.
So, start with the basics. Picture the shot you want, plan it out, head outside, and capture it.
The rest will follow naturally.
Note: Some links on this page are affiliate links. What does this mean? If you buy/rent using these links you're helping support us and it costs you nothing extra. Thank you for your support.
Get this ebook for free now!